Starting point for this tutorial.
This tutorial uses Moho's Switch layers to show you how to perform instant, automatic lip-syncing. A switch layer contains multiple sub-layers, but only one of the sub-layers can be displayed at a time. This makes it very useful for lip-sync animation: each sub-layer can be a mouth shape for a different sound.
The method of lip-sync described in this tutorial is quick and easy, though not always super-accurate (but give it a try - it may be accurate enough for your animation). For the most accurate lip-sync results, we recommend using a program like Magpie or Pamela. Lip-syncing using one of these programs is covered in the next tutorial.
QuickTime is required for automatic lip-syncing in order to process and analyze audio files. If you don't already have QuickTime installed, you can download it for free here.
For this tutorial, we'll start with a project file that's almost finished. It's named "Tutorial 5.1" and it's located in the "Tutorials/5 - Animation" subfolder within the main Moho folder. Open this file in Moho, expand the "Mouth" layer in the Layers window, and you should see something like this:
Starting point for this tutorial.
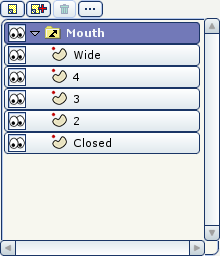
Examine the sub-layers in the "Mouth" layer. Notice that from bottom to top they range from closed to wide open. This is the basic setup for automatic lip-syncing. The number and names of the sub-layers don't matter, as long as the lowest one is closed and the highest one is wide open.
Next, we want to hear the audio file that will go along with the lip-syncing. Choose the "Select Soundtrack" command from Moho's Animation menu and select the file "clinton.mp3", located in the "Tutorials/5 - Animation" subfolder within the main Moho folder. You can play back the animation now to hear the result, but the mouth doesn't move yet. Stop the playback before proceeding.
Double-click the "Mouth" layer. When the Layer Settings dialog opens, click the "Switch" tab:
Layer settings for the mouth.
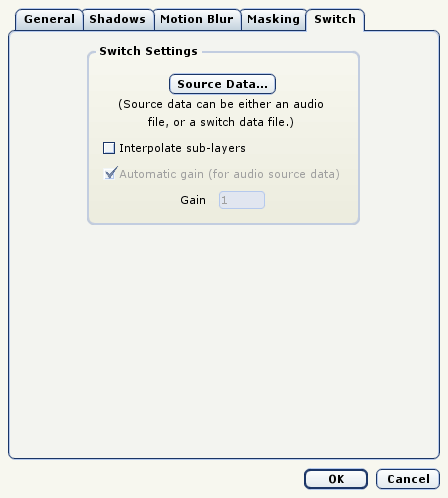
Click the "Source Data..." button to select the file that will control the Switch layer. In the file dialog that appears, select the file "clinton.mp3". Click the dialog's OK button.
That's it! The audio file was analyzed and keyframes were attached to the Switch layer. When the audio is quiet, Moho activates the lowest layer (the closed mouth), and when the audio is loudest, Moho uses the highest layer (the wide open mouth). In between, Moho switches on the in between mouths. Play back the animation to see and hear the result. In general, because automatic lip-sync is based on the actual sound in the audio file, it is important to use an audio file without background noise or music.
The final result.