
In this tutorial you will learn how to draw simple shapes in Moho. The following tutorials will build on what you start drawing in this tutorial.
Launch Moho by double-clicking its icon. Or, if Moho is already running, select File->New to create a new document. Choose the File->Project Settings... menu command and click the Background Color rectangle. Pick a nice sky blue color for the project's background. Click OK when you're done.
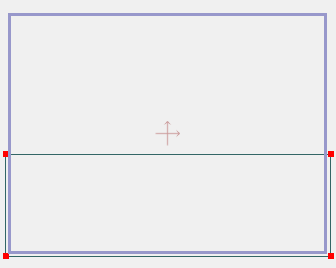
In the Tools window, click the Rectangle tool to activate it. In the tool options area at the top of the main window, you'll see two checkboxes, "Auto fill" and "Auto outline" - make sure both of those are un-checked. (Normally, you might want the rectangle to be filled automatically, but we're turning that option off now to show you how to fill shapes on your own.) Click and drag in the working area to create the rectangle shown below:
Draw a simple rectangle.

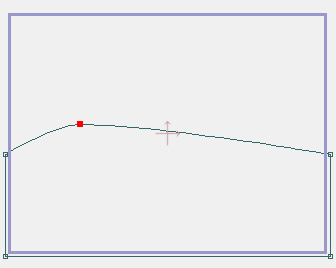
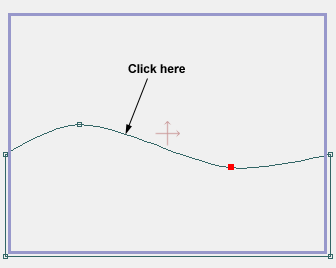
This shape is going to be the start of some rolling hills. So far, these hills look kind of flat, so let's fix that. Pick the Add Point tool from the toolbar. Click on the top edge of the rectangle and drag the mouse upwards:
How to add a point to an existing shape.

You should have something now that looks like the picture below. If this isn't what you got, select the Edit->Undo menu item and try again. Be sure to click on the line that forms the top of the rectangle and drag upwards from there.
Drag the new point upwards.
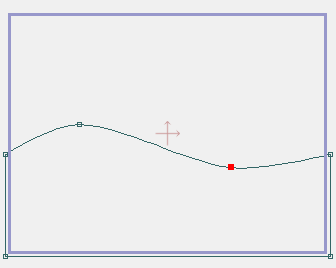
Let's add another curve to the hills by clicking a little more to the right and dragging downwards:
Add a second point and drag it downwards.
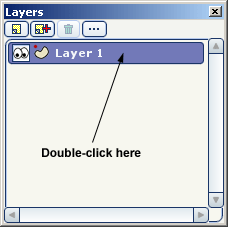
To keep things organized, it's a good idea to name the layers in a Moho project. Double-click this layer (the only one so far) in the Layers window.
Accessing a layer's properties.
In the dialog that appears, type in "Hills" for the layer name and click the OK button.
In Moho, visible objects are made up of fills and outlines. The hill you just drew is invisible as far as Moho is concerned. You can see the curves you drew, but if you were to output the project to an image or movie file, all you would see is empty space. The purpose of the fill editing tools is to define what shapes should be filled or outlined, and with what colors and styles.

Now click the Create Shape tool, and click on an edge of the hills to select the entire outline of the hills. The figure below shows where to click to select the entire hill shape. Alternately, you could use the Edit->Select All menu command to select all the points in the current layer.
Select an entire curve by clicking an edge.
The background hills should highlight to indicate that they've been chosen to be filled, as shown below:
Highlighted shape to be filled.
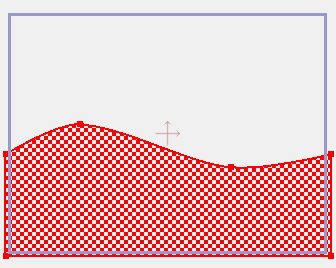
However, this shape hasn't actually been filled yet. The highlighting shows you what's ready to be filled - when it looks right and you're ready to fill the shape, activate the fill by pressing the spacebar on your keyboard. This is an important step that must not be overlooked - be sure to press the spacebar after highlighting the shape in order to actually fill it.
After creating the fill, the Style window will display the settings for the fill: its color, its line width and color, and the styles used to display it. For this fill, click the fill color box and set the color to brown, be sure the line width is set to 1, and choose 'Gradient' from the Effect 1 pop-up menu.
The Style window.
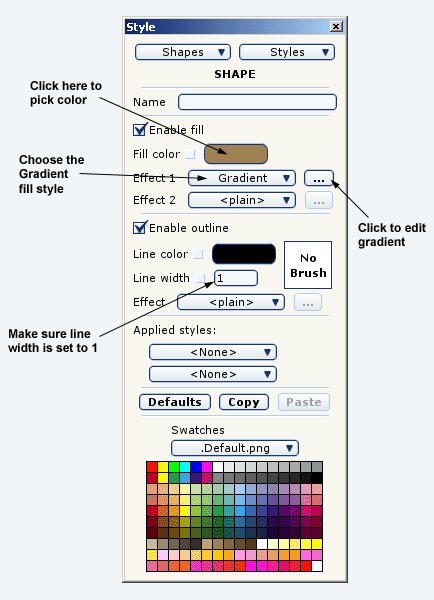
When you select the Gradient fill style, Moho automatically opens up the gradient settings dialog. If you want to change the gradient settings later, click the details button to the right of the pop-up menu. In the gradient settings dialog, set Color 1 to green and Color 2 to brown as shown below and click OK.
Gradient settings.

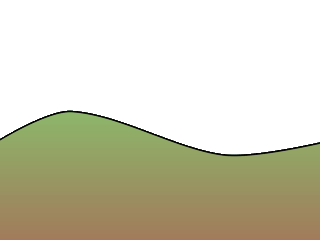
You can see the result of this fill by selecting File->Render. A window will appear, displaying the final output of the project so far. Close the window when you're done.
Final result.
Choose the File->Save As... command from the menu and save the project under the name "Tutorial 1.2". In the next tutorial we'll continue working on this scene by adding more complex shapes.