Starting point for this tutorial.
This tutorial demonstrates Moho's camera tools. These tools allow you to move an entire scene around as if you were pointing a camera at it. With a little setup work, you can even create different layers of depth in the scene.
For this tutorial, we'll start with a project file that's almost finished. It's named "Tutorial 6.7" and it's located in the "Tutorials/6 - Effects" subfolder within the main Moho folder. Open this file in Moho, and you should see something like this:
Starting point for this tutorial.

This file contains a few layers of simple scenery that we will move the camera across. To do this, select the Track Camera tool and drag the mouse around in the main editing area. Notice how all the layers move together, even though they aren't grouped. When you move the camera around, it affects all the layers in a project. In the tool options area at the top of the main Moho window, click the Reset button to reset the camera.
Now we'll introduce some depth into the scene. Activate the Translate Layer tool and select the layer called "Right Hill". In the tool options area at the top of the main Moho window, change the Z value to -1 and press <enter>. Below you can see where to set the Z value for the layer.
Setting a layer's Z value.

Now select the "Left Hill" layer, and set its Z value to -2. Finally, select "Sky", and set its Z value to -20.
Try dragging the Track Camera tool around again and notice the difference. It's like driving in a car - nearby objects go by quickly, while distant objects seem to move slowly. In the tool options area at the top of the main Moho window, click the Reset button to reset the camera.

Now try dragging the Orbit Workspace tool around the workspace. This tool allows you to examine your scene in 3D, from outside the view of the virtual camera. In this case, notice how the different layers are spaced apart in the Z direction - this is what creates the sense of depth from the camera's point of view. The camera itself appears as a small blue wedge pointing in the direction of view. When you've seen enough, select the View->Reset menu command to go back to the camera view.
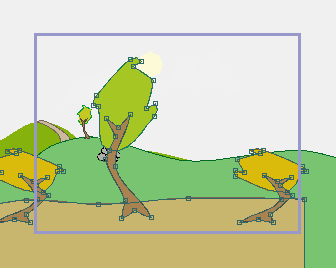
Now we'll try animating the camera. Make sure the current frame is set to 0, and select the Track Camera tool. Drag to the left in the main editing area until you set up a view that looks about like this:
Camera view at frame 0.
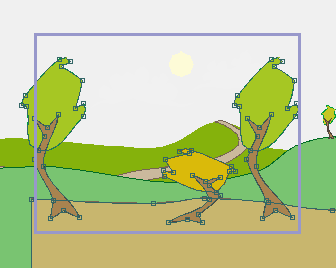
Next, set the current frame to 72, and drag to the right. This will pan the camera to the left - keep going until you have a view that looks like this:
Track to the left.
Press the Play button in the timeline to play back this simple camera animation. Notice how the layers of the project seem to pass in front of and behind each other. This is a simple way in Moho to create a sense of depth.
The final result.