Starting point for this tutorial.
This tutorial shows you how the layer shadow options can be used to create visual effects other than shadows. Glows and outlines are the two possibilities we'll look at.
For this tutorial, we'll start with a project file that's almost finished. It's named "Tutorial 6.6" and it's located in the "Tutorials/6 - Effects" subfolder within the main Moho folder. Render this file to see what it looks like to start with:
Starting point for this tutorial.

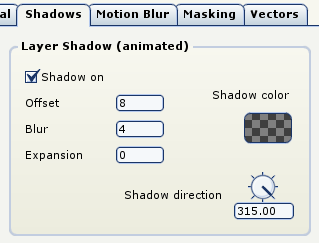
Before we try any tricks, let's take a look at a basic layer shadow. Double-click the only layer in this file, Layer 1, to bring up the Layer Settings dialog. Go to the Shadows tab, and leaving all the other settings alone, turn on the "Shadow on" checkbox. Click OK to dismiss the dialog.
Default shadow settings.
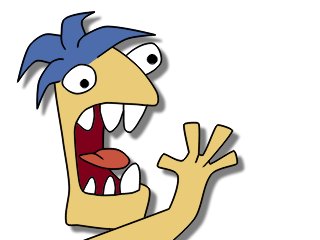
Try rendering the scene again, just to be sure that you have an idea what a regular layer shadow looks like in Moho:
Layer shadow.
Now we'll change the shadow settings to create a glow effect. Double-click Layer 1 again to bring up the Layer Settings dialog. Change the Layer Shadow settings to match the values below:
Glow settings.
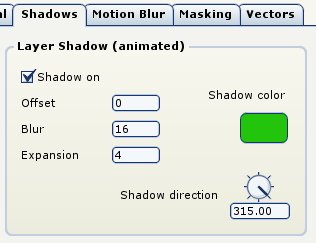
An offset of 0 means the "shadow" will be centered under the layer that is casting it. With an offset of 0, the shadow direction has no significance. A high blur value gives the glow a nice soft edge. Finally, the expansion parameter tells Moho to expand the shadow, making it bigger than the layer itself. Without expansion, the glow would just barely extend beyond the edge of the layer. The exact color you choose is not important - just be sure to make the color opaque. A transparent glow may be too faint to see. Render the scene again, and it should look like this:
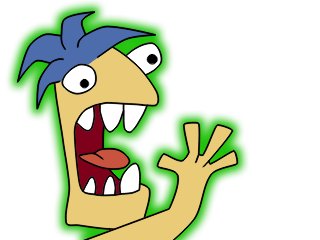
Layer glow.
Let's change the shadow options once again to create an outline effect. Some styles of animation use a heavier outline around the outside of objects than for interior lines. Adjusting the layer shadow values in the right way can make this style very easy to accomplish. Double-click Layer 1 again to bring up the Layer Settings dialog. Change the Layer Shadow settings to match the values below:
Outline settings.

Again, we use an offset of 0 to keep the "shadow" centered under the layer. A blur value of 0 is used to keep a hard edge on the shadow. Finally, the expansion parameter is used in this case to set the width of the outline effect. For this effect, it's important to make the color totally black and totally opaque to match the interior lines. Render the scene again, and it should look like this:
Layer outline.
