Starting point for this tutorial.
This tutorial shows how to use particle layers for something other than swarming insects, smoke, or fireworks. Using the correct settings, particle layers can also be used to produce clusters of many objects, but without making them fly around like particles usually do. Fields of grass and crowds of people are just two possibilities that we'll explore.
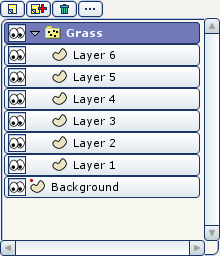
To get started quickly with this tutorial, start by opening the project file named "Tutorial 6.2", located in the "Tutorials/6 - Effects" subfolder within the main Moho folder. This file has a particle layer that we'll modify to simulate a field of grass. The layers in this file are set up as shown:
Starting point for this tutorial.
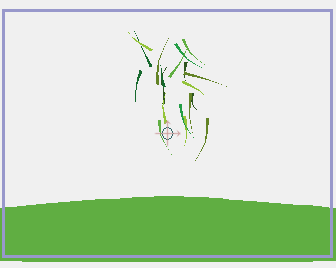
The editing view should look like this to begin with:
Starting point in editing view.
The particle layer "Grass" in this file is currently set up with the default settings for a particle layer. The sub-layers (Layer 1 - Layer 6) are each a single blade of grass. Each one has a slightly different color and shape to create variety. If you play back the animation, you'll see that the default particle layer settings aren't very good for a field of grass - the grass particles fly up in the air and then sink downwards. All we have to do is make a few small changes to get the grass to look right.
Double-click the Grass layer to bring up the Layer Settings dialog. Click the Particles tab to access the settings for the particle layer. Change the settings to match the ones below and click OK.
Grass particle settings.
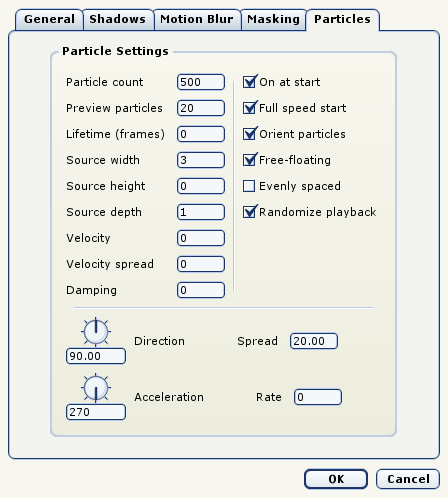
Below we describe why each of the settings is set the way it is. Any settings that aren't mentioned below don't matter for this situation (for example, orient particles doesn't matter since the particles have no velocity).
Besides scattering particles in the Z direction, when source depth is set to a non-zero number, the particle layer will sort particles according to depth - this is very important for the kinds of animations we're working with in this tutorial. We wouldn't want far away blades of grass to appear in front of closer ones. Randomize playback makes the grass look better than if all the blades were moving in sync, but it can be even more important when working with a crowd of people, as we'll see later in this tutorial.
OK, the grass is almost finished. All we need to do is use the Translate Layer tool to move the Grass layer downwards so that it sits on the ground:
Grass lowered into place.
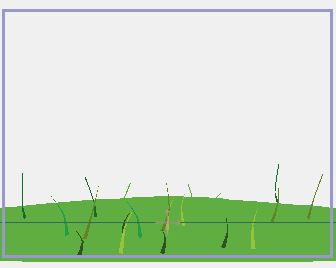
In preview mode, it doesn't look like much, so you may want to try playing back the result and rendering it out as a movie file:
Final render.

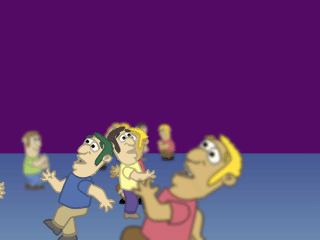
Now we'll show how to use the same general techniques to simulate a crowd of people. Open the file named "Tutorial 6.2", located in the "Tutorials/6 - Effects" subfolder within the main Moho folder. This file is already completed - there's nothing you need to change in this file, it just shows another example of using particle layers.
The Crowd layer has the same basic settings we used for the field of grass, only using fewer particles. Each of the sub-layers in the crowd was created from one layer with a simple cycling animation. This one layer was duplicated and had some colors changed just for variety. The "Randomize playback" setting for the particle layer is really important for this crowd - if it was turned off, then each character in the crowd would move in sync with all the others (you can try this yourself). This may be desirable in some cases, but here we want each character to move independently, even though they all have the same basic movement. Play back the animation or render a movie file to see how it all comes together. (By the way, depth of field is enabled in the Project Settings dialog - that's why some of the closer or farther characters appear a bit blurry.)
A crowd as particles.