Starting point for this tutorial.
In a Moho vector layer, shapes are ordered from back to front. This ordering determines which shapes will appear in front of or behind others. This tutorial will show you how to work with shape ordering.
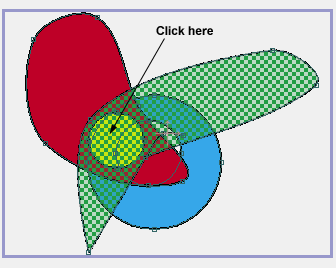
For this tutorial, we'll start with a project file that's almost finished. It's named "Tutorial 2.4" and it's located in the "Tutorials/2 - Draw" subfolder within the main Moho folder. Open this file in Moho, and you should see something like this:
Starting point for this tutorial.
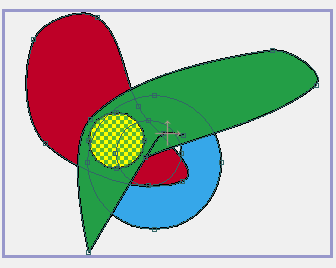
As you can see, there are four shapes in this file. By the way they overlap one another, you can also tell their ordering. From back to front, there is a red shape, a green shape, a blue shape, and a yellow circle.

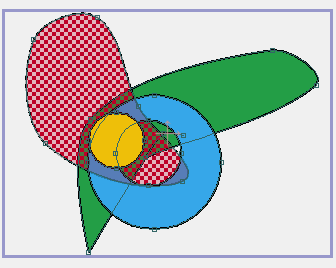
If you want to change the order of some shapes, the first thing you need to do is select a shape to work with. Using the Select Shape tool, click anywhere on the red shape. It will become highlighted with a checkerboard to indicate that it is selected. Notice that you can also see it faintly beneath the other shapes - this is so that you can see the entire selected shape, even if it is normally obscured by other shapes.
Selected shape highlighted.


To raise the shape, click once on the Raise Shape tool. Notice that the red shape has now moved one step up in the layer order, above the green shape:
Raised shape.
The selected shape can also be raised by pressing the up-arrow key on your keyboard. Right now, press the enter key to de-select all objects in the layer. The red shape will switch back to normal to indicate that it is not selected:
De-select the shape.


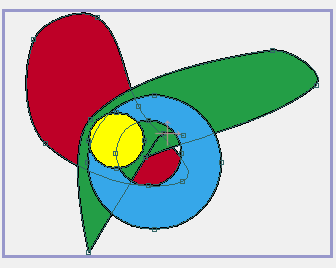
Next, use the Select Shape tool and click on the blue shape to select it. Press the down-arrow key twice or click the Lower Shape tool twice to lower the blue shape below the red shape, and then below the green shape:
Lowered blue shape.

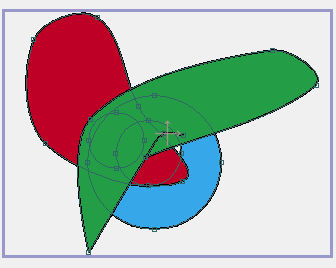
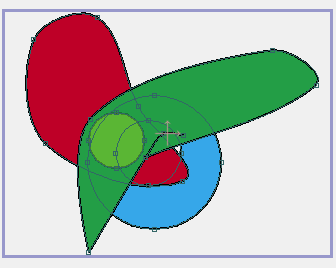
You can also raise a shape to the top (above all others in that layer) or lower it to the bottom (behind all others in that layer). Select the green shape and hold down the <shift> key while pressing the up-arrow key. With a single key press, the green shape moves all the way to the top of the layer's shape order.
Raise green shape.

If you now press the enter key, the green shape will be de-selected. Notice that at this point the yellow circle is behind the green shape, and can't be seen. You can still see the curves that make up the yellow circle, but the shape itself, being behind the green shape, is not visible:
Hidden yellow circle.
Now we want to bring the yellow circle back to the front. Using the Select Shape tool, click on the yellow circle, even though it's hidden. As you may have expected, the green shape gets selected because it is in front:
Selected green shape.
Now comes the trick for selecting shapes lower in the ordering. Hold down the <ctrl> key while pressing the down-arrow key. This tells Moho to pick the next deeper shape in the layer ordering at the same point you just clicked. The yellow circle will now be selected. It will be kind of faint to remind you that it is actually behind other shapes in the layer:
Selected yellow circle.
Finally, hold down the <shift> key while pressing the up-arrow to bring the yellow circle all the way to the top of the layer ordering, making it fully visible once again:
Raised yellow circle.