When drawing in Moho's vector layers, the concept of "welding" points is very important. This tutorials will show you examples of how (and why) points can be welded, and will go on to show you some examples of good and bad welds you can do in Moho.
When you weld two points together in Moho, Moho really is combining those two points into one. There are a couple reasons to do this: First, welding the two endpoints of a curve together creates a closed curve. Second, if two shapes join up at a particular point, and you want them to remain joined during an animation, then welding those points together will guarantee that those two shapes will remain joined.
There are two ways to weld points in Moho: manually and automatically. To manually weld two points together, use the Translate Points tool to drag one point on top of the other and press the spacebar. Here's an example of this method. Although you can't see the keyboard in the example, keep in mind that the spacebar was pressed at the moment when the two points overlap. After welding, notice how the two points move as one.
Welding by pressing the spacebar.
The second method of welding is automatic. Using this method, when you drag a curve endpoint on top of another point and let go of the mouse, those points are automatically welded together. For automatic welding to work, be sure that the "Auto-weld" checkbox is turned on in the tool options area when the Translate Points tool is active:
Make sure Auto-weld is on.

Here's an example of automatic welding. In this case, the spacebar was not pressed to initiate the weld - as soon as the mouse is released, the two overlapping points are automatically welded together.
Automatic welding.
Here's another example of automatic welding. Remember that only a curve endpoint can be automatically welded. However, the point that it is welded to does not need to be an endpoint:
More automatic welding.

Automatic welding also works with the Add Point tool. When you add a new point, you can drag it around as if you were using the Translate Points tool. As long as the new point you added is a curve endpoint, it can be automatically welded to another point. If the new point is not an endpoint, you can still weld it to another point manually by pressing the spacebar when it overlaps another point.
Besides welding two points together, Moho can weld a point to the middle of a curve segment. This can be done with either the automatic or manual welding methods. Here's an example:
Welding to a curve segment.
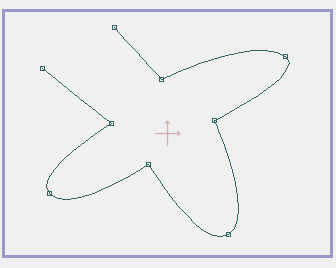
OK, so that covers welding points, but why do you want to weld points again? Well, the main reason is to create fillable shapes. In order to fill a shape with color, that shape needs to be completely closed. This is only possible if you weld some points together. The following shape cannot be filled with color because it is not closed:
A non-closed shape.
By welding the two endpoints together, we can create a closed shape that can then be filled:
A closed shape that can be filled.

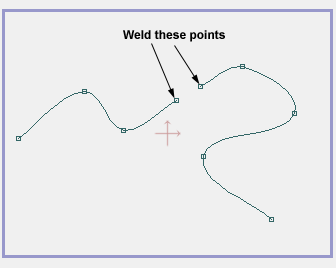
Let's look at some examples of good welding choices. First, the following two points could be welded to create a single, continuous curve:
Joining two curves.
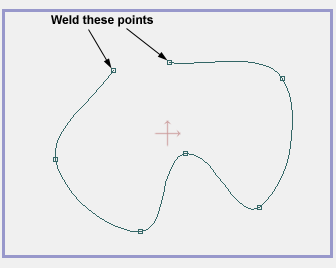
The next case shows the classic case of welding a curve closed to create a fillable shape:
Closing a curve.
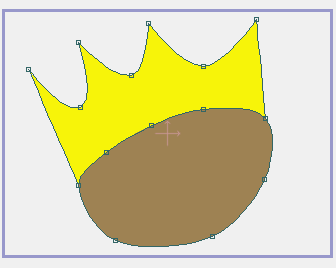
Next, we show a shape made up of several curves. Notice that a closed, fillable shape does not need to be made up of a single curve. The shape below, after welding, is made up of three curve segments, but is still closed and can be filled with color:
Joining multiple curves into a single closed shape.
The welded and filled shape.
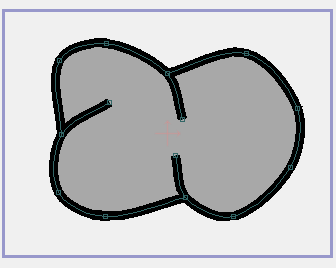
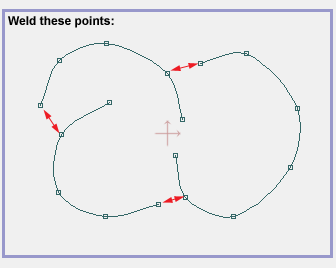
Finally, the example below shows two circles lined up side-by-side. The two side points of the circles have been welded together so that when they move around during an animation they remain joined. If those points were not welded, moving them in sync like this would require a lot of extra work.
Joined circles.
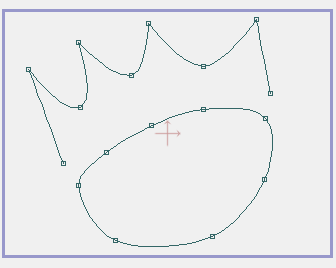
Typically, when you weld together two points, one of them should be a curve endpoint. This isn't always true, but most often it is. If you find yourself welding together two points and neither is an endpoint, take a moment to think whether the weld is appropriate. Here's an example of a bad choice of welding. Suppose you had the following two shapes and you were considering welding the pairs of circled points:
Before welding the marked points.

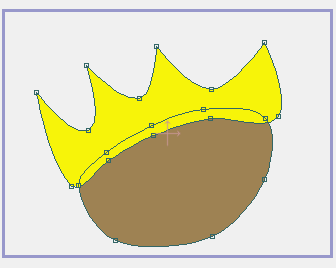
Although Moho will let you perform those welds, it isn't really a good idea. What you would end up creating is a shape with lots of little holes in it. Along the section of curves that you welded together are little bubbles that make it impossible to fill the two main shapes:
Bad welding.

Instead, a better approach is to just move the two shapes closer together without any welding at all. In this case, welding the two shapes together doesn't have any benefit.
Fill the shapes without welding them together.

Another approach in this situation would be to cut the top shape apart with the Delete Edge tool and then weld the remaining endpoints to the lower shape. First, cut the top shape apart:
Cut the redundant curve away.
Then, weld the newly-created endpoints onto the lower shape. With this approach you don't end up with a double curve all welded together. The resulting shape is much cleaner and easier to work with:
Weld the new endpoints.