
I was going to record a tutorial - which i may still do, but i thought if i post a file and a bit of explenation you might be able to put two and two together
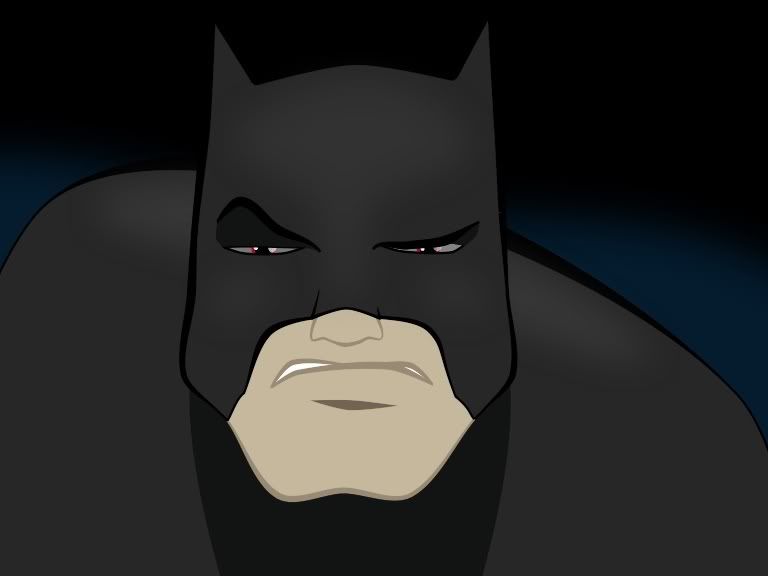
This is the result - not particularly amazing, but i did it in about 10 minutes for demo purposes:
anme file
Basically this file contains a few of the techniques i use pretty much all the time...
The hole/layer order technique, and the basic shape shading technique.
Have a play with the file... drag the bottom lip around, drag the top eyelid over the bottom one, and move the eyebrows about... its pretty versatile!
here is the stacking order:
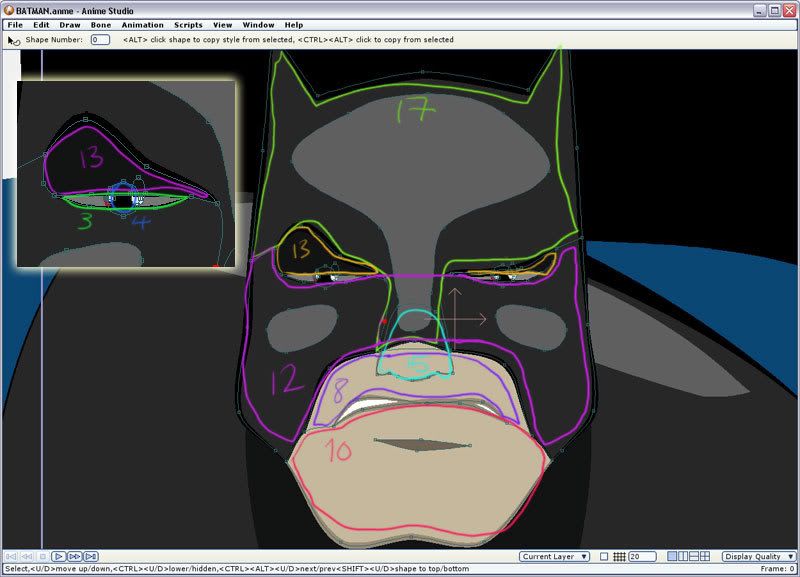
Basically you can see by the numbers, the bottom jaw can go over the opper lip, the forehead can go over the eyes/cheeks, and the nose sits above the cheers but below the forehead...
the zoomed view of the eyes show that the top lid is above the cheeks, so when he blinks the top eyelid can go over the bottom one.
For pupils and anything that goes IN the mouth - you just have to make sure they are above the background fill (in the eyes this is layer 3 - so pupils are 4) but below anything that should be covering them (in the mouth this would be 8 and 10, so as long as the inside of the mouth shape is lower, and any teeth/tongue are higher but below 8/10 it will sit inside the mouth.
I think this is the best way to make eyes and mouth and control overlap... ive tried having lots of seperate shapes but i'm sure you'll agree if you look at the file that the build is quite minimal and clean... you could potentially also split things in half horizontally so that one side is always stacked above the other incase you want to do head turns - but this is a theory i've not yet practiced...
The shape shading is just simple shapes with a soft edge effect... i think this gives a nice effect and you can keep points to a minimum for animation purposes...
I hope you find this useful - as i say, its nothing new, i learned it off Heyvern i think, but i've not seen it documented...
btw, most of these shapes started as a humble square which i them made rounded edges of the points and added/moved more about... Also, so i can control stacking order, i tend not to auto fill anything and fill them when i've planned the order they should go - it can always be changed later, but saves some hassle.
Ask if you need any more clarification
p.s. the eyebrows are their own shape - i selected the 4 points and hit space to make the line so it can be on top of everything.


