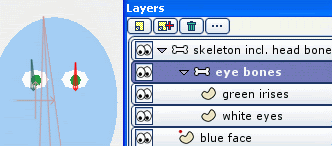
I'm going through the tutorials step by step, yet can't seem to figure out how to get the 'Bind Bones ' icon to remain active so I can use it.
I thought it was a screw up in the way that I created my models' layers , but when I open the Popeye arm from the tutorials folder( which has just one layer ) I still get the same problem : I add a bone then go to press the bind bones button , but it and the one beside it are both grayed out.
What am I doing wrong ?
Also, how do I group layers together . Can I flatten a group of layers into one or easily move a combination of them all at once ?
Example : My eye has a background white layer , an iris layer , a color eyelid lid layer with no stroke, and finally a plain black lined stroke with no fill.
In order to move the eye around, I must select each layer and move them around trying to line them up.
What is the correct way of doing it ?
I plan to use a bone that is parented to the eye and all its parts, but since I can't get the bones working yet , I'm not sure if you can control more than one layer at a time .
Anothe question : How do I copy and paste a section of frames in the animation toolbar ? I tried bound selecting the frames from 1 to 15 and hit the copy and paste buttons - but nothing happened.
I have the mouth opening and closing and I'd like cycle it for several frames for a snoring action.
Thanks !
Bones question
Moderators: Víctor Paredes, Belgarath, slowtiger
- stephklein
- Posts: 69
- Joined: Thu Dec 15, 2005 8:09 pm
- Location: Winnipeg, Manitoba, Canada
- Contact:
To use the Bind Points tool you have to select the layer that the points are on. When you add bones you are selecting the bone layer, but then to bind it, you have to select the vector layer you want to apply to the bone.
You can create a Group layer the same way you create any other layer. This group layer lets you move all of its sublayers at once. For something like an eye, though, it might be more practical for you to just put all of those shapes on one normal layer.
To copy/paste animation in the timeline window, you first must select the keyframes you want to copy, and hit the copy button, or Alt-C (Ctrl-C & Ctrl-V don't work in this window); then place the timeline cursor at the frame where you want to paste the keyframes and hit the paste button or Alt-V. For your mouth cycle, you might consider using an action instead of doing everything in the main timeline. With an action, you can create the piece of animation once, and then insert it multiple times. See the Actions tutorial.
-Steph Klein
- stephklein
- Posts: 69
- Joined: Thu Dec 15, 2005 8:09 pm
- Location: Winnipeg, Manitoba, Canada
- Contact:
Is there some special way to do this that I need to know ?stephklein wrote:To use the Bind Points tool you have to select the layer that the points are on. When you add bones you are selecting the bone layer, but then to bind it, you have to select the vector layer you want to apply to the bone.
.
I create a new bone layer > add a bone or two > switch to my 'head' ( vector ) layer ( where the bones are located in the model > go to bind them but the icon is grayed out > go up to the top menu but that's grayed out too > Select all the points thinking that the points have to be selected or it won't work = that doesn't work either .
What am I doing wrong ?
Thanks !
Hi Vegan,
Two points to note:
1. You must be in frame 0 (the "setup" frame) for binding to work.
2. The layer to be bound must be a child layer of the bone layer. You can see where the child layer is indented from the parent layer (see Tutorial 1.4 Bone Setup for the process for vector layers, but it works much the same for any layer).

There is no 'Bind Bones' button, only Bind layer and Bind Points.
When you bind an entire layer to the bone (select the layer to be bound, select the Bind Layer tool, click the bone), the bone should turn red. If it didn't, you missed, try again.
Particularly useful for image layers - see Tutorial 4.1, and have another look at the Layers Window hierarchy.
When you are binding points to a bone (as stephklein says, select the points layer, select Select Bone tool, select bone to be bound to, select Bind Points tool, select points, then hit Spacebar key to confirm selection), don't forget that last step of Spacebar to confirm.
However, in many cases automatic point-to-bone binding works well for vector layers (don't forget to change to region binding) - see Tutorials 1.4, 3.1 and 3.4.
Regards, Myles.
Two points to note:
1. You must be in frame 0 (the "setup" frame) for binding to work.
2. The layer to be bound must be a child layer of the bone layer. You can see where the child layer is indented from the parent layer (see Tutorial 1.4 Bone Setup for the process for vector layers, but it works much the same for any layer).

There is no 'Bind Bones' button, only Bind layer and Bind Points.
When you bind an entire layer to the bone (select the layer to be bound, select the Bind Layer tool, click the bone), the bone should turn red. If it didn't, you missed, try again.
Particularly useful for image layers - see Tutorial 4.1, and have another look at the Layers Window hierarchy.
When you are binding points to a bone (as stephklein says, select the points layer, select Select Bone tool, select bone to be bound to, select Bind Points tool, select points, then hit Spacebar key to confirm selection), don't forget that last step of Spacebar to confirm.
However, in many cases automatic point-to-bone binding works well for vector layers (don't forget to change to region binding) - see Tutorials 1.4, 3.1 and 3.4.
Regards, Myles.
"Quote me as saying I was mis-quoted."
-- Groucho Marx
-- Groucho Marx
- stephklein
- Posts: 69
- Joined: Thu Dec 15, 2005 8:09 pm
- Location: Winnipeg, Manitoba, Canada
- Contact:
